Product Overview
Product Name: Stainless Steel Slump Test Device
Operation Method
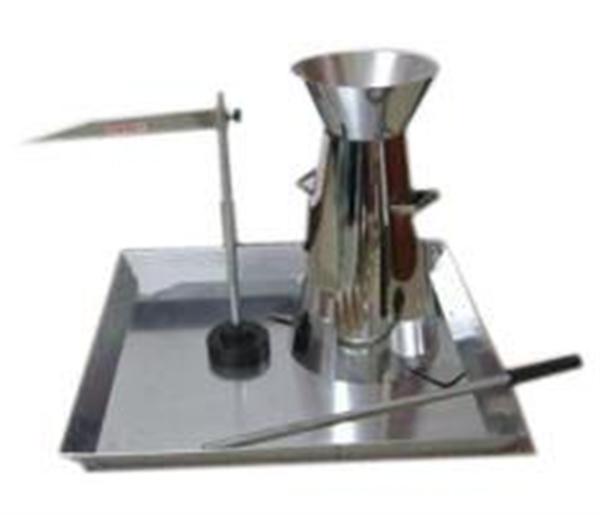
1. Before starting, make sure all the tools such as the slump cone, trowel, and mixing board are wetted with a damp cloth. The slump cone has an upper diameter of 100mm, a lower diameter of 200mm, and a height of 300mm, forming a trumpet shape.
2. Weigh the materials according to the mix ratio: first weigh cement and sand, then add them to the mixing board. Mix thoroughly, then add the aggregates and stir again. Add half of the required water, mix well, and then add the remaining water until the mixture is uniform. The total mixing time should be approximately 4-5 minutes.
3. Place the slump cone on a non-absorbent rigid surface and position the funnel above it. Fill the cone in three layers, each about one-third the height of the cone. Insert the tamping rod from the edge toward the center in a spiral pattern, 25 times per layer without impact. Distribute the material evenly across the interface. When filling the bottom layer, ensure the rod reaches the full depth. For the other two layers, insert the rod 20–30 mm into the previous layer.
4. After filling, trim the excess mixture with a trowel and smooth the top. Remove any concrete around the base of the cone. Carefully lift the slump cone within 5–10 seconds to avoid lateral or torsional forces. The entire process, from loading to removal of the cone, should take no more than 150 seconds.
5. Place the slump cone next to the concrete sample and lay a ruler horizontally across the top. Measure the vertical distance from the bottom of the ruler to the highest point of the sample using a steel ruler. This measurement is called the slump, and it should be recorded to the nearest 1 mm, rounded to the nearest 5 mm. If the sample collapses or shears during the test, the test should be repeated. If the issue persists, the concrete may be difficult to handle and should be noted.
6. If the slump exceeds 220 mm, measure both the maximum and minimum diameters after expansion. If the difference between these two diameters is less than 50 mm, use the average as the slump spread value. Otherwise, the test is invalid. The slump spread should also be measured to the nearest 1 mm and rounded to the nearest 5 mm.
HuiZhou Antenk Electronics Co., LTD , https://www.atkconn.com